UltiDev Cassini Web Server Beta 1 is obsolete.
This document is only applicable if you are using Beta
1 version of the UltiDev Cassini. We strongly
recommend you to upgrade to
the latest version of Cassini.
Cassini Overview
Cassini for ASP.NET
Application Developers
Downloading and Installing
Cassini
Checking whether your existing
application is compatible with Cassini
Debugging your Application with
Cassini
Packaging and Distributing
ASP.NET Cassini Applications
UltiDev Cassini Overview
UltiDev
Cassini is a lightweight web server capable of hosting ASP.NET applications.
UltiDev Cassini is highly improved compared to original
Cassini web server sample from www.asp.net. Cassini's primary advantage over IIS is that it does not require IIS to be installed
on the target computer and that UltiDev Cassini can be distributed along with your ASP.NET application's
MSI.
UltiDev Cassini is absolutely free and requires no fees
of any kind at all, ever! The most natural place for Cassini is home PCs and office desktops – areas where enterprise software, like IIS, is not installed or supported.
Cassini for ASP.NET
Application Developers
Cassini, as it’s distributed by UltiDev LLC, is
based on code published at
www.asp.net. However, to make Cassini truly
useful and developer-friendly we added some very
powerful features.
-
We made Cassini a
windows service capable
of running multiple ASP.NET applications
simultaneously;
-
We added very simple .NET
API allowing
registering and
un-registering ASP.NET
applications with Cassini server;
-
We added
Cassini Explorer - ASP.NET application management user
interface. Cassini Explorer is an ASP.NET app running under
Cassini, of course;
-
And most important for developers, we added a
re-distributable setup package – Cassini
merge module, which you can include in your
application setup projects. Mere inclusion of
the Cassini merge module into your application
distribution package will install Cassini on
your clients’ computers.
When your ASP.NET application is deployed, you simply programmatically register
your application with Cassini using either
Configuration API or stand-alone registration utility shipped with Cassini.
On top of all this, Cassini server can be used as a standalone, non-service
application, which allows convenient debugging of your ASP.NET application under
Cassini.
Cassini comes in two versions that are functionally identical, but target
different versions of .NET Framework. Cassini 1.1 supports ASP.NET applications
compiled for ASP.NET 1.0 and 1.1 and requires .NET Framework 1.1 to run. Cassini
2.0 supports applications compiled for ASP.NET 1.0, 1.1 and 2.0, and requires
.NET Framework 2.0 to run. You decision which one to use will be driven by what
version of CLR you expect your customers to have, as well as what version of
ASP.NET your application was made for.
The remainder of this document is the set of
detailed walkthroughs explaining how to make your
ASP.NET application working with Cassini, how to
debug with it, and how to create setup packages for
your ASP.NET application that include Cassini.
Downloading and Installing Cassini
You can download and install Cassini from UltiDev.com
download page. During installation Cassini won’t ask you
for anything and will just install itself, register its
components, and create an “UltiDev | Cassini ASP.NET
Server” group in the Programs menu. There you will find
shortcuts to Cassini application configuration UI, and
some other useful stuff.
Checking whether your existing application is compatible
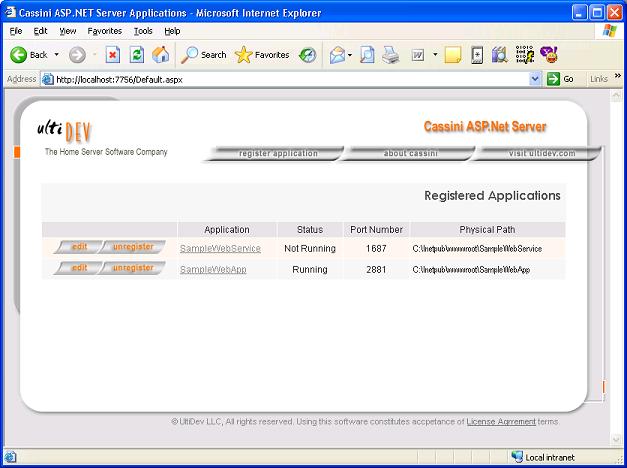
with CassiniAfter you installed Cassini on your development box, the
first thing you may want to do is register your existing
application(s) with Cassini. To do that, fire up Cassini
Application Configuration utility, and add your
application(s). It’s OK if your applications are also
registered with IIS – Cassini and IIS coexist quite
peacefully. When registering an Application with Cassini
the only required pieces of data are the application
GUID and the folder where application is located. Once
you have registered the application, see if it works by
clicking the application name link.
Application GUID is a means of avoiding duplications
when registering applications programmatically.
Registering an application with existing GUID will
replace previous application parameters, like name, port
and location, and replace it with new ones.
When registering an application it’s recommended that
you let Cassini assign a free port to your application
instead of specifying the port explicitly. Regardless
what port your application is on, you can access the
application by pointing your browser to
http://localhost:7756/RedirectToApp.aspx?AppID=<your
application GUID>. That is port-independent URL to your
application.
Debugging your Application with Cassini
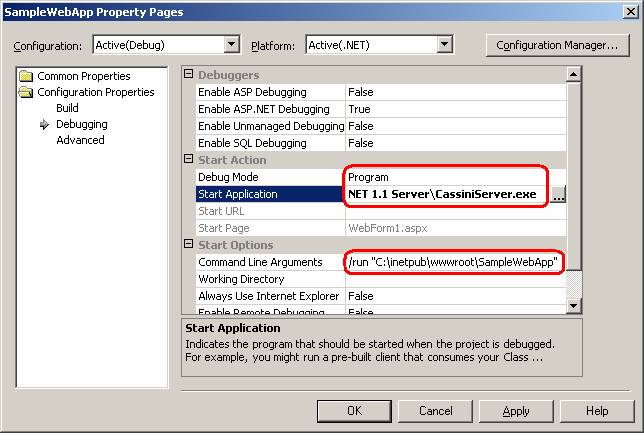
You can debug your application under Cassini server
using one of two options. First, less convenient, is to
attach the debugger to CassiniServer.exe (or
CassiniServer2.exe for ASP.NET 2.0) process. Second -
the more convenient one is to run Cassini Server as a
standalone console application. To do that switch from
Project to Program debugging in Visual Studio Project
Settings, specify “C:\Program Files\UltiDev\Cassini
ASP.NET 1.1 Server\CassiniServer.exe” as an application,
and set command line arguments to “/run” “c:\inetput\wwwroot\yourApplicationFolder”,
or whatever the path to your application folder.
That’s about it. When you hit Build | Debug, Cassini
will start up in console mode, will start hosting your
application, and will launch the browser pointing to
your application. You will be able to stop at
breakpoints and inspect variable values just as if it
was debugging under IIS. CassiniServer.exe takes some
more optional parameters along with /run command, so you
could tell what port, application ID, and browser to use
so you could debug the application with FireFox or any
other browser.
Packaging and Distributing ASP.NET Cassini Applications
Distributing your Cassini application is quite simple. Create regular Setup
Project (not a web setup project – that’s for IIS installations) include
CassiniRedistributable.msm (or Cassini2Redistributable.msm for ASP.NET 2.0
applications) merge module into the setup project, and create custom installer
steps registering and un-registering your application. Mere inclusion of the
Cassini merge module into the project will ensure the Cassini gets installed and
fired up when your application is being installed. At the moment your
application is ready to register itself with Cassini, Cassini is already up and
running. Here are the detailed steps describing creation of Setup Project for a
Cassini-based application.
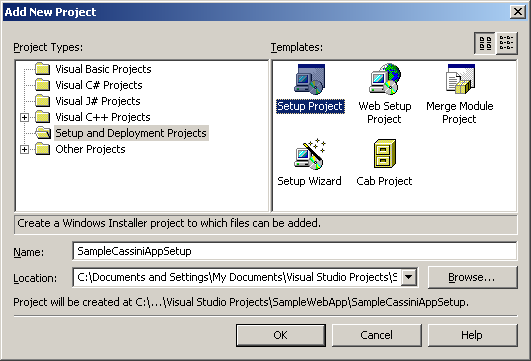
Add a new setup project to your web application
solution.
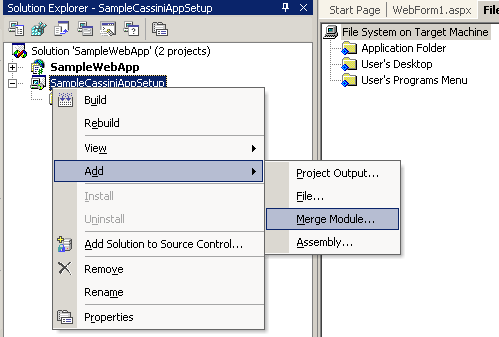
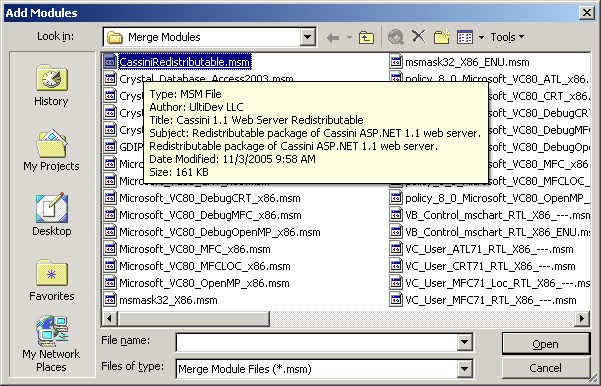
Add Cassini merge module to your setup project from
“C:\Program Files\Common Files\Merge Modules” folder.
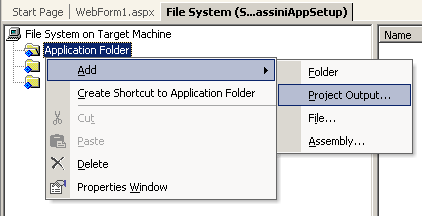
Add your application files to the setup project.

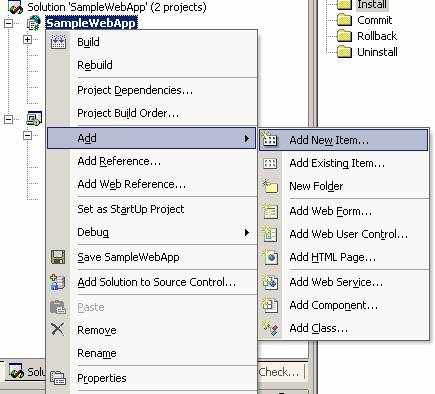
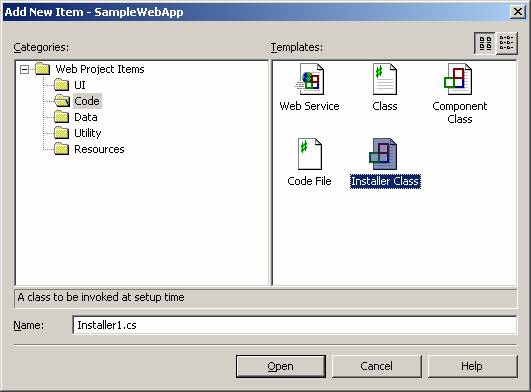
Add Installer class to your application. This class will
be used to register your application with Cassini Server upon installation, and
un-registering during uninstallation.
Add CassiniConfiguration assembly reference to
your application project. This will enable your application to access Cassini configuration functionality
programmatically . There are several instances of CassiniConfiguration assembly on your box. Please choose one from either
“C:\Program Files\UltiDev\Cassini ASP.NET 1.1 Server” folder – for ASP.NET 1.1
applications, or from “C:\Program Files\UltiDev\Cassini ASP.NET 2.0 Server” –
for ASP.NET 2.0 applications.

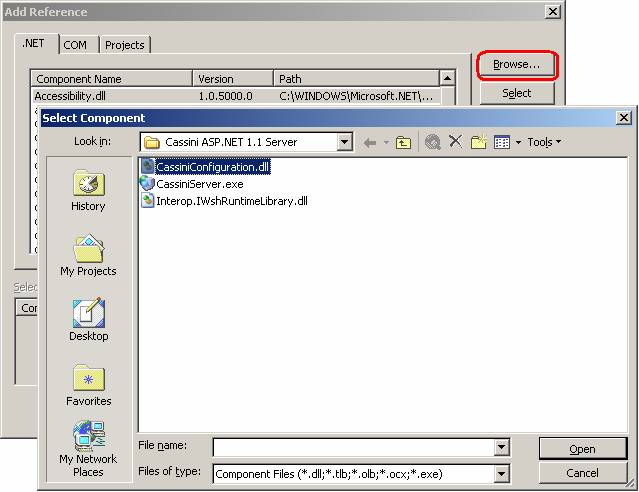
Please do the test build of the solution and check if
CassiniConfiguration.dll has appeared in the Detected
Dependencies bin of your setup project. If not, please
go to the File System view of the Setup Project, and
highlight Bin folder under the Application Folder.
Right-click Bin folder and select Add | File. Navigate
to your ASP.NET application's Bin folder, which is
usually "c:\inetpub\wwwroot\YourAppName\bin" and
double-click CassiniConfiguration.dll.
Now you will need to implement custom installation step
that will register your application with the Cassini
Server. Start with pasting following code snippet into
Installer1.cs class. This snippet is a sample code that registers and un-registers
your application with Cassini during installation/un-installation process.
private static readonly Guid applicationID
=
new Guid("{88EEE2B2-57D5-4869-A85E-9666FCDD390E}");
public override
void Install(IDictionary savedState)
{
base.Install(savedState);
string appLocation =
Context.Parameters["applocation"];
CassiniConfiguration.Metabase.RegisterApplication(
applicationID, "My Great Web Application",
"Application description",
appLocation, "WebForm1.aspx");
}
public override
void Rollback(IDictionary savedState)
{
base.Rollback
(savedState);
CassiniConfiguration.Metabase.UnregisterApplication(applicationID);
}
public override
void Uninstall(IDictionary savedState)
{
base.Uninstall
(savedState);
CassiniConfiguration.Metabase.UnregisterApplication(applicationID);
} Please note that you will have to replace highlighted parameters with
appropriate values specific to your application (explained below).
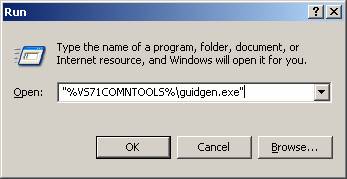
Now, generate an ID for your application by running GUID generator utility
"%VS71COMNTOOLS%\guidgen.exe".
Copy new GUID to the clipboard…
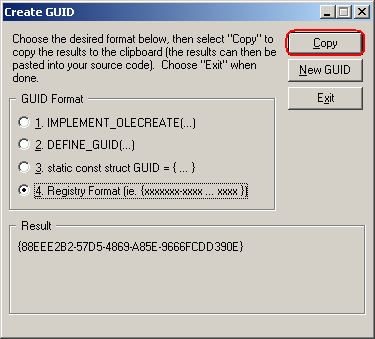
…and paste it in code snippet above replacing GUID highlighted by yellow marker.
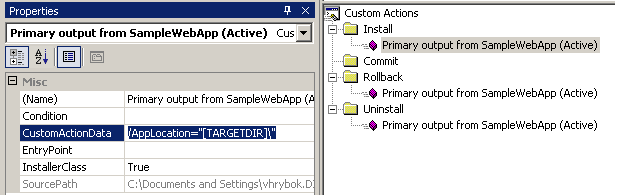
On this step you will hookup your custom installer class to the setup project.
You will need to add Custom Actions to your setup project as shown on the next
figure. You will also need to specify CustomActionData parameter that will pass
target installation folder path to the custom installer class (see Install()
method implementation in the snippet above).
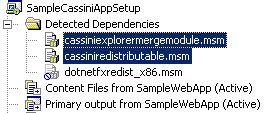
Once everything is ready please check that Detected Dependencies folder in your
setup project contains CassiniExplorerMergeModule.msm. If it does not, add it
from the “C:\Program Files\Common Files\Merge Modules” folder.
If you want to add a Programs menu shortcut to your application, please do
following.
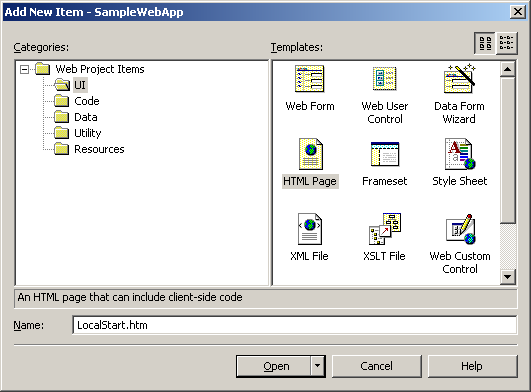
Add an Html Page file to your application project and call is something like
LocalStart.htm.
Open the file in text editor and
replace its content with the following:
<!DOCTYPE HTML PUBLIC
"-//W3C//DTD HTML 4.0 Transitional//EN">
<html>
<head>
<title></title>
<meta
http-equiv="refresh"
content="0;url=http://localhost:7756/GoToApplication.aspx?AppID=88EEE2B2-57D5-4869-A85E-9666FCDD390E"/>
</head>
<body>
</body>
</html>Replace highlighted GUID with your application ID you
generated not long ago.
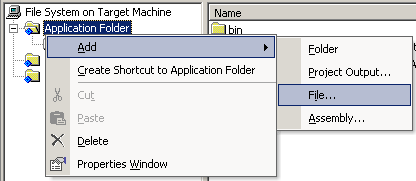
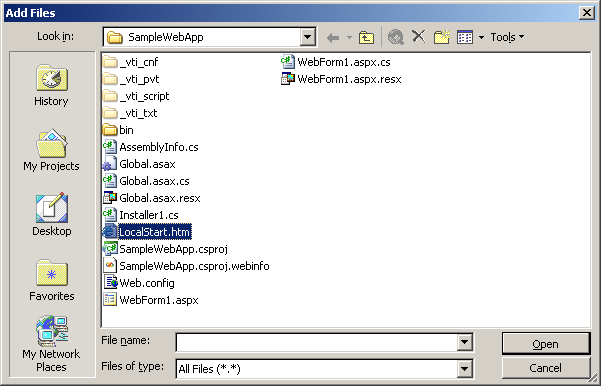
Now to work around some kinks of the setup project, add
the LocalStart.htm file to your setup project’s
Application Folder:
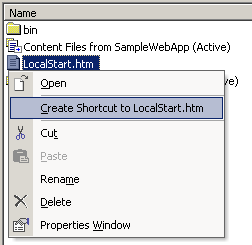
After that, right-click the LocalStart.htm file in the
right pane of the File System window of the Setup
Project and click Create Shortcut menu item.
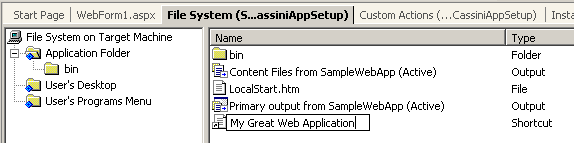
Rename the shortcut to reflect the name of your
application.
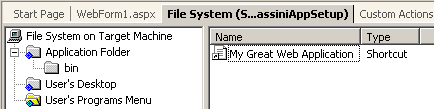
Drag & Drop the shortcut to the User’s Programs Menu.
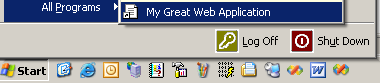
Build the solution and install your application. After
the installation you should see the shortcut in the
Programs menu.
Event though you probably know it already, VS.NET Setup
Projects often get their Detected Dependencies messed up
if you try to build the solution when your product is
installed. If your Detected Dependencies got out of
tune, uninstall your product, right-click the Detected
Dependencies folder in the Setup Project and do Refresh
Dependencies. After that all automatic dependencies
should get back to normal so you can build your
application with no problem.
|
 |