Welcome to UltiDev Cassini Web Server for ASP.NET
distribution walkthrough. This document explains how to
create a Visual Studio 2005 solution that will
include an ASP.NET 2.0 application project and a Setup
project for installing the application along with UltiDev
Cassini Web Server on a target machine.
Similar steps could be taken in Visual Studio 2008
to create an installer for an ASP.NET 3.x or 2.0
application.
The process of creating a setup project for an
ASP.NET 1.1 application is slightly different and is
described in the
corresponding
article.
Conceptually, creating a redistributable package
for an ASP.NET 2.0 application including UltiDev Cassini
consists of the following steps:
- Create a regular, non-web, setup project and add it to
the solution that has ASP.NET application;
- Add UltiDev Cassini Web Server as a Pre-Requisite to
the setup project - to include the reference to UltiDev
Cassini components into the Setup.exe bootstrapper
generated by Visual Studio 2005.
- Add custom actions to the setup project that register
the ASP.NET application with Cassini after installation
and unregister during uninstallation;
This will create a distribution package that will
ensure that the latest version of UltiDev Cassini Web
server is deployed and started on the target machine
before your application is installed.
This walkthrough assumes that UltiDev Cassini Web
Server for Visual Studio 2005 Developers installed and
that you have an existing
solution with an ASP.NET application opened in the Visual Studio 2005
or 2008 IDE. In the end you will have a project
closely resembling the
sample
project we provided for Visual Studio 2005.
First thing to do is to add a new setup project to your
existing ASP.NET web application solution. Please select
File | Add | New Project menu item and add a new
regular Setup project to the solution:

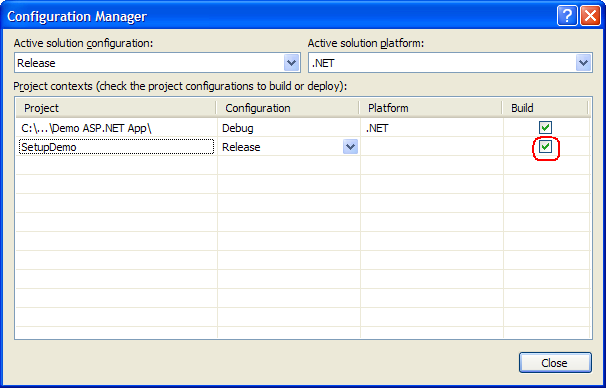
- Ensure that setup project is going to be built. For that
right-click the solution item and select Configuration
Manager. There check the "Build" checkbox for your setup
project for at least Release build configuration.
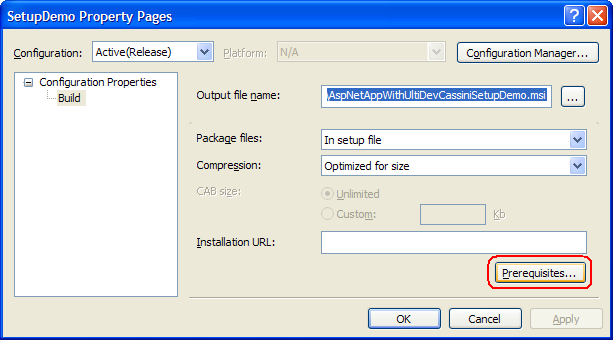
- Add UltiDev Cassini Web Server 2.0 Pre-Requisite to
the setup project. To do that right-click setup project
item in the solution tree and select Properties menu
item. In the popped-up dialog click Prerequisites
button:
Check ".NET Framework 2.0" (3.5 for ASP.NET
3.x projects), "Windows installer 3.1" and
"UltiDev Cassini Web Server for ASP.NET 2.0"
prerequisites:

Depending on whether you are going to distribute your
application via web or ship it on a CD, select an
appropriate radio-button in the "Specify the install
location for prerequisites" section. This will generate Setup.exe bootstrapper with the built-in knowledge of
where to find Cassini in case it's not present on
customer's box.
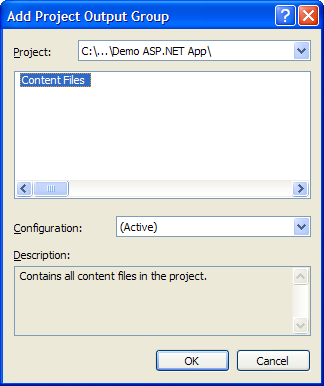
The web project files get added depending on
the type of the ASP.NET project in
the solution. "Web Site" project, most common in
Visual Studio 2005, does not get compiled, so
all its files - ASPX markup as well as
code-behind C# or VB.NET files - are deemed to be
Content Files. "Web Application" project, which
is native in Visual Studio 2008 and is an add-on
in Visual Studio 2005, compiles code-behind in
the DLL and therefore has both binary output and
content files.
Please skip this step if your ASP.NET project
type is "Web Application".
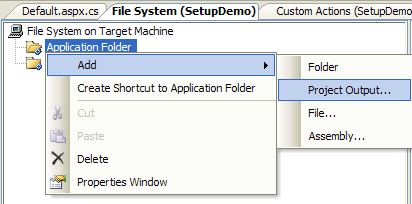
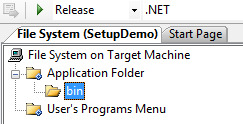
Add web project's Content Files to the Setup project:
- Create bin
folder under the Application Folder:
If your ASP.NET project
type is "Web Site", please use
previous step instead.
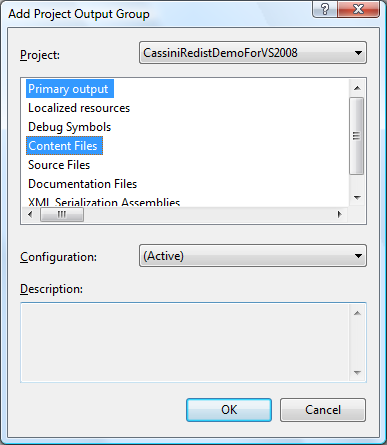
Add web application's "Content Files" and "Primary
output" to the Setup project.
After you click OK, bin folder will be
added automatically to the "Application Folder". If not,
please create "bin" folder manually.
UltiDevCassiniServerConfiguration.dll
assembly is a part of UltiDev Cassini
package and contains custom installer class
that can be invoked from a Setup project to
register or un-register an ASP.NET
application with UltiDev Cassini.
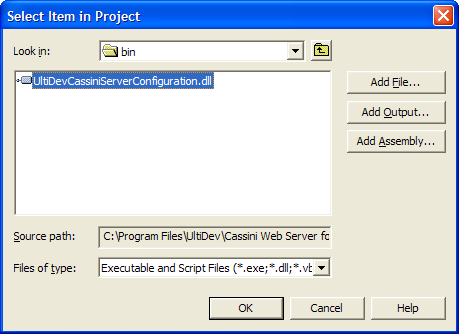
To add UltiDevCassiniServerConfiguration.dll
to your Setup project, using Setup project's
File System View, right-click on "bin" folder and select Add | Assembly...
In the Open File dialog navigate to UltiDev Cassini
folder, which is usually "C:\Program
Files\UltiDev\Cassini Web Server for Visual Studio 2005
Developers" (in older versions it could be
"C:\Program Files\UltiDev\Cassini Web Server for ASP.NET
2.0"). On 64-bit systems both paths start with
"C:\Program Files (x86)".

... and pick UltiDevCassiniServerConfiguration.dll.
UltiDevCassiniServerConfiguration.dll contains routines
that register and unregister ASP.NET applications with
UltiDev Cassini.
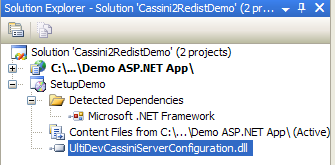
After you have added UltiDevCassiniServerConfiguration.dll, your
Setup project will look like this:
Next step is to hook up installer class located in UltiDevCassiniServerConfiguration to your setup
project's custom installer actions, which will register
and unregister your ASP.NET application with Cassini
during installation and uninstallation.
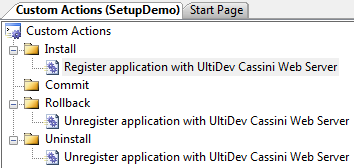
Start with creating Install, Rollback and Uninstall
custom actions in the Setup project, pointing to the UltiDevCassiniServerConfiguration.dll
you've just added. To do that switch to the Custom
Actions View of the Setup project and right-click on
Install, Rollback and Uninstall actions and select Add
Custom Action menu. In the Select Item dialog
navigate to the Application Folder\Bin folder and select UltiDevCassiniServerConfiguration.dll for each custom action:
Rename custom actions from
UltiDevCasiniServerConfiguration.dll to something more meaningful.
The result will look like this:
At this point you hooked up Cassini's installer
class to setup project's custom installer
actions. Now you just need to pass application's registration information to the Cassini
Configuration module.
"Install" action requires several parameters, while
Rollback and Uninstall steps require only one parameter
- application ID. Application ID should be a unique
GUID. You can either generate a new GUID using MS Guidegen.exe utility, or better, just reuse an
UpgradeCode of your setup project.
To specify application ID for Rollback action, select
UltiDevCassiniServerConfiguration.dll under Rollback bin and set CustomActionData property value to /AppID="[UpgradeCode]":

Then repeat the same for the
Uninstall action. CustomActionData values for Rollback and Uninstall steps
should be identical.
"Install" action has following parameters passed via CustomActionData property:
| Parameter |
|
Meaning |
Example |
|
/AppID |
Required |
Application ID |
/AppID="[UpgradeCode]" |
| /AppLocation |
Required |
Physical
location of the application. Should always be set to
"[TARGETDIR]\". |
/AppLocation="[TARGETDIR]\" |
| /AppName |
Optional |
Application
Name |
/AppName="Test Cassini 2.0 Setup App" |
| /AppDescription |
Optional |
Application
Description |
/AppDescription="some useful text" |
|
/AppPort |
Optional |
Application
Port |
/AppPort="80" |
Don't specify the port explicitly if possible! Cassini
Explorer can redirect user's browser to the correct application URL by
application ID if you point the browser to
http://<macchinename>:7756/GoToApplication.aspx?AppID=<your
application ID>.
Web service clients can too call
Cassini Explorer web service at
http://<machinename>:7756/CassiniConfigurationService.asmx
to get your application's URL. |
| /AppDefaultDoc |
Optional if
default document is Default.aspx or
Index.htm |
Default
application document |
/AppDefaultDoc="WebForm1.aspx" |
|
/AppKeepRunning |
Optional |
Flag telling if
application should always be kept in memory for
quick first-page response. Default value is true. |
/AppKeepRunning="false" |
Another important consideration for the Install
action is that it needs to be configured slightly
differently in Visual Studio 2005, compared to Visual
Studio 2008. The reason is that upgrade scenario flow in
MSI packages generated by VS'05 is
different from the the upgrade flow of MSIs created
with VS'08.
Here's the example of the Install action's CustomActionData value
and other settings for the Visual Studio 2005
Setup project:

This is the the example of the Install
action settings in the Visual Studio 2008
setup project.
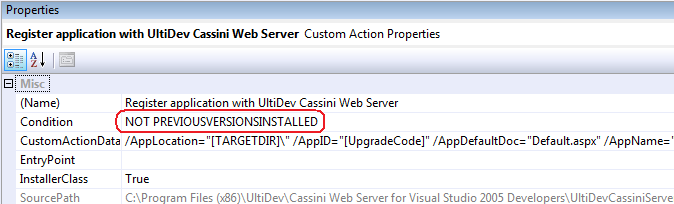
As you can see, the only difference is the value
of the Condition property, which is set to "NOT
PREVIOUSVERSIONSINSTALLED" for Visual Studio
2008 setup project. This setting essentially
makes Install action called only for "clean",
non-upgrade installation. It's done because
unlike MSIs generated by Visual Studio 2005,
Visual Studio 2008 creates installers that in
the upgrade mode do not call Uninstall custom
step of the previous version of the package,
essentially bypassing unregistration of your
application. It has an upside: your application
will remain registered on the same port and
there will be virtually no downtime caused by
reloading of applications by UltiDev Cassini due
to application unregistration/registration
sequence of the VS'05 MSIs. The downside is that
upgrade scenario, which used to be a rough
equivalent of uninstallation of the previous
version, followed by installation of the new
one, has become more nuanced.
At this point you can test
the installation by running Setup.exe. Real-world deployment project will be a bit
more complex than this walkthrough, and even
though we highly recommend that you
familiarize yourself with the inner workings of
the Visual Studio Deployment Project, there are
some tips we would like to share.
- Set InstallAllUsers
property of the Setup project to
True. Since your application will
be served by a service that is
user-agnostic, there is no reason to make
menu shortcuts limited to the installing
user.
- Set RemovePreviousVersions
property value to True.
This will ensure that versions of the same
product line are not installed side-by-side.
Instead, newer version of the product will
replace the older one.
- Set meaningful values to text
properties, like Author, Manufacturer,
ManufacturerUrl (if you have your web site),
ProductName and Title.
- For Visual Studio 2008 and "Web
Application" type of the ASP.NET project it
is important to ensure that each new release
of the web application has higher FileVersion number compared to the previous
release. If old and new versions share the
same FileVersion, upgrade flow of the MSI
will not replace old binaries with the new
ones. The easiest way to do that is to
remove FileVersion attribute from
AseemblyInfo.cs file and make AssemblyInfo
attribute looking like this:
[assembly:
AssemblyVersion("1.0.*")]
From this point forward the information
in this document
is not really related to the Application + Cassini
installation topic, but rather just a general tips for
your non-IIS web application setup...
If you want to add a Programs menu shortcut to your application, please do the
following.
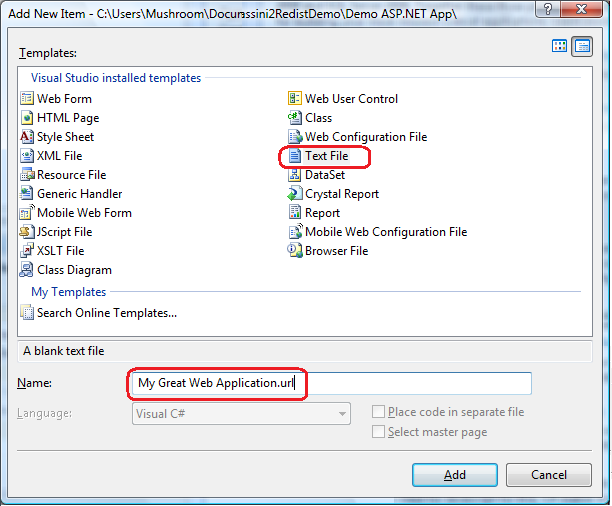
Add an text file to your ASP.NET application project and save with the ".url"
extension. The name of the file will be the text
displayed by Programs menu, it should reflect the name
of your application.
Open the file in text editor and
replace its content with the following:
[InternetShortcut]
URL=http://localhost:7756/GoToApplication.aspx?AppID=87C97D89-B993-411D-A0EF-782191F1DBDD
Replace highlighted GUID with your application's
actual UpgradeCode property value.
The URL in the "My Great Web
Application.url" file takes
browser to GoToApplication.aspx page of the UltiDev
Cassini Explorer, and passes your application ID as a
parameter. Cassini Explorer will find port assigned to
your application and will redirect the browser
to it. This will always correctly invoke
your application even though the application will get
different ports assigned to it on different machines at
the registration time.
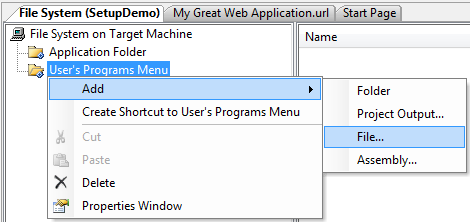
Now to work around some kinks of the setup project, add
the "My Great Web Application.url" file to your setup project’s
User's Programs Menu folder:
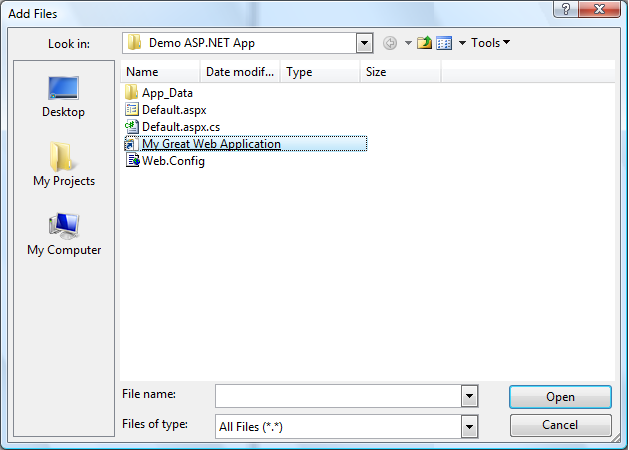
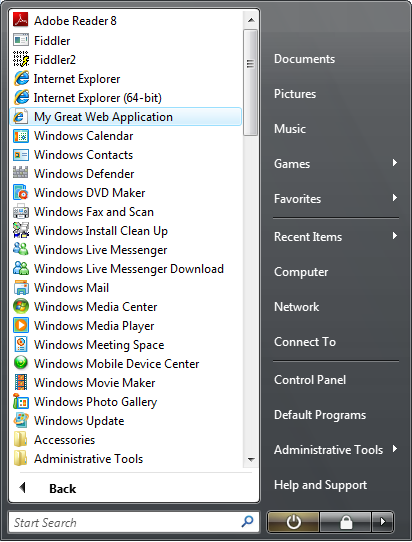
Build the solution and install your application. After
the installation you should see the shortcut in the
Programs menu.
If you need
additional information,
please visit our support forum,
where most common questions have been asked and
answered. |